The solution is described here: Windows: The Simplest Load Balancing Cluster with Failover - Evidian.
To explore demonstrations and additional video content, visit the SafeKit Online Training.
Prerequisites
- You need the application that you want to put in a farm installed on 2 nodes or more (virtual machines or physical servers).
Package installation on Windows
-
Download and install the free version of SafeKit on 2 Windows nodes (or more).
Note: the free version includes all SafeKit features. At the end of the trial, you can activate permanent license keys without uninstalling the package.
-
Upon completing the package installation, select Set console credentials and firewall rules now and configure a password for the admin user of the SafeKit console.
Set the same password on all nodes.
-
Exclude from antivirus scans C:\safekit\ (the default installation directory) and all replicated folders that you are going to define.
Antiviruses may face detection challenges with SafeKit due to its close integration with the OS, virtual IP mechanisms, real-time replication and restart of critical services.
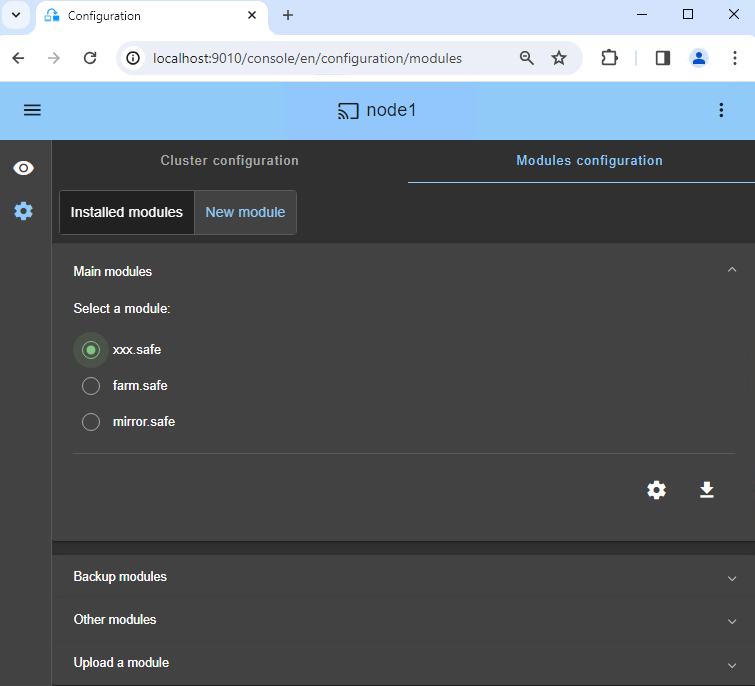
Note: the generic farm.safe module that you are going to configure is delivered inside the package.
1. Launch the SafeKit console
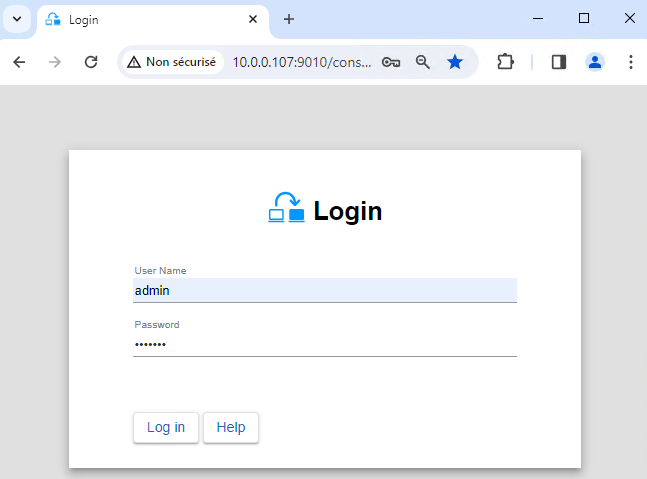
- Launch the web console in a browser on one cluster node by connecting to
http://localhost:9010
. - Enter
admin
as user name and the password defined during installation.
You can also run the console in a browser on a workstation external to the cluster.
The configuration of SafeKit is done on both nodes from a single browser.
To secure the web console, see 11. Securing the SafeKit web service in the User's Guide.
2. Configure node addresses
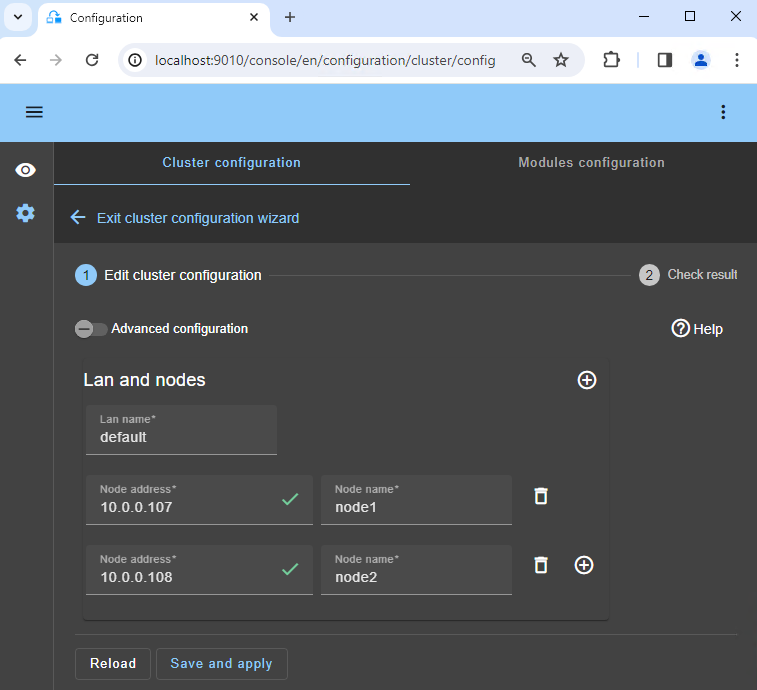
- Enter the node IP addresses, press the Tab key to check connectivity and fill node names.
- Then, click on
Save and apply
to save the configuration.
If either node1 or node2 has a red color, check connectivity of the browser to both nodes and check firewall on both nodes for troubleshooting.
In a farm architecture, you can define more than 2 nodes.
If you want, you can add a new LAN for a second heartbeat.
If you click on Advanced configuration
, the cluster.xml
file is displayed. This file, automatically populated by the console, is the one that will be deployed on the nodes.
4. Configure the module
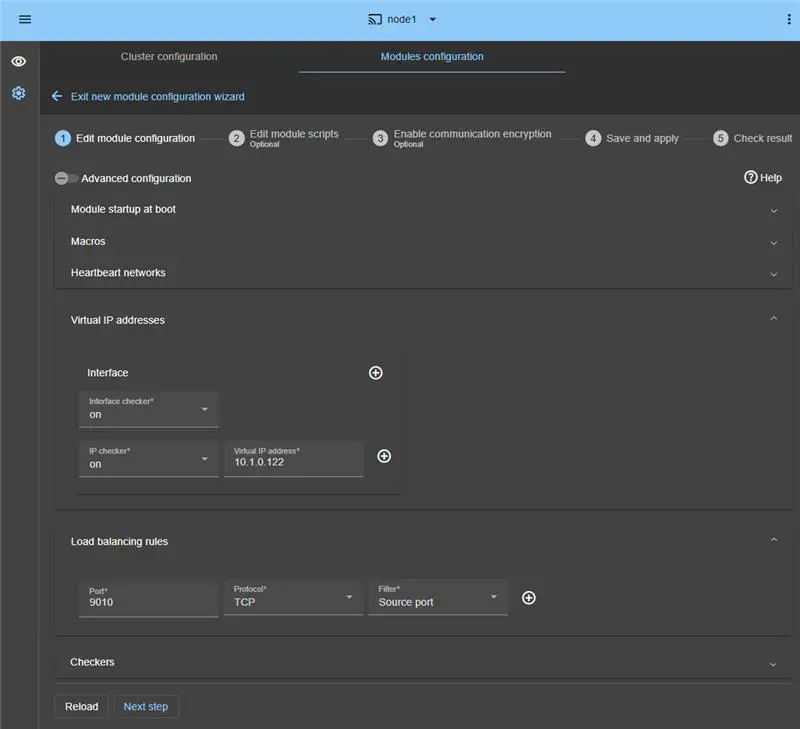
- In
Module startup at boot
, choose an automatic start of the module at boot without delay. - In
Macros
/SERVICES
, enter the service names of your application, in the startup order, separated by commas. - In
Heartbeat networks
, you should have a single heartbeat network except if you have added a LAN at step 2. - In
Virtual IP addresses
, enter a virtual IP address. A virtual IP address is a standard IP address in the same IP network (same subnet) as the IP addresses of both nodes.
Application clients must be configured with the virtual IP address (or the DNS name associated with the virtual IP address). - In
Load balancing rules
, set the service port to load balance (ex.: TCP 80 for HTTP, TCP 443 for HTTPS, TCP 9010 in the example). - In
Load balancing rules
, set the load balancing rule,Source address
orSource port
:- with the source IP address of the client, the same client will be connected to the same node in the farm on multiple TCP sessions and retrieve its context on the node.
- with the source TCP port of the client, the same client will be connected to different nodes in the farm on multiple TCP sessions (without retrieving a context).
- In
Checkers
, you will be able to configure checkers if needed, such as process monitoring, custom checkers, TCP, ping, or split-brain checkers.
For example, if a process name is displayed inMonitored processes/services
, it will be monitored with a restart action in case of failure. Configuring a wrong process name will cause the module to stop right after its start.
If you click on Advanced configuration
, the userconfig.xml
file is displayed. This file, automatically populated by the console, is the one that will be deployed on the nodes along with the restart scripts.
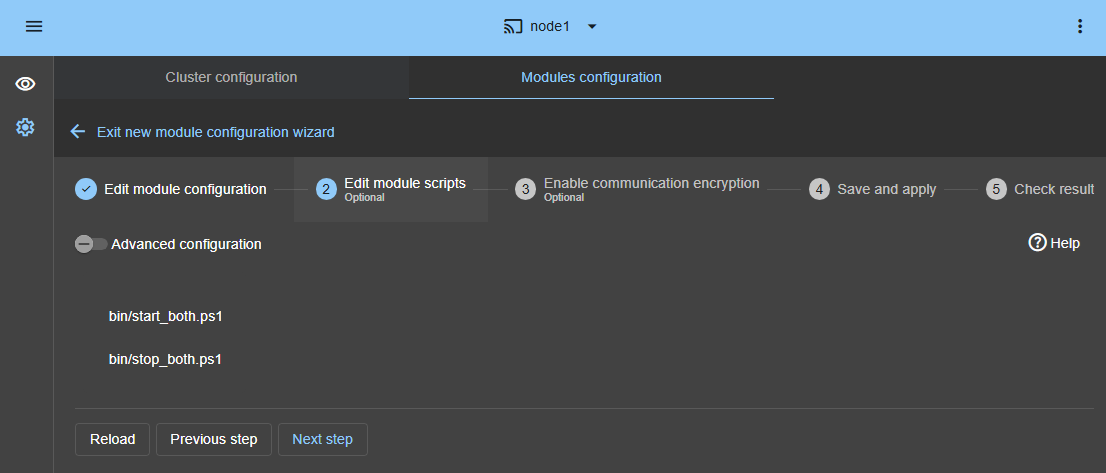
5. Edit scripts (optional)
- This step is optional and can be skipped in most cases, as the restart scripts are already pre-configured to restart services defined in the previous step.
- So, click directly on
Next step
. - start_both.ps1 starts all services in the order specified in the
SERVICES
list, while stop_both.ps1 stops all services in the reverse order. - Additionally, start_both.ps1 checks the startup of each service and stops the module if any service fails to start correctly.
- During module configuration, the boot startup of services will automatically be set to ‘Manual’. This ensures that services do not start automatically upon system boot, but instead, they will be initiated only when the module itself is started.
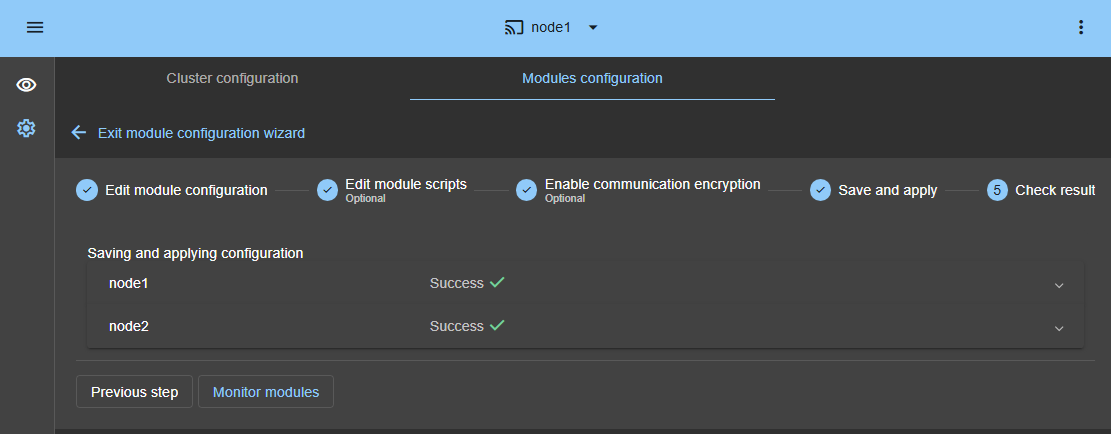
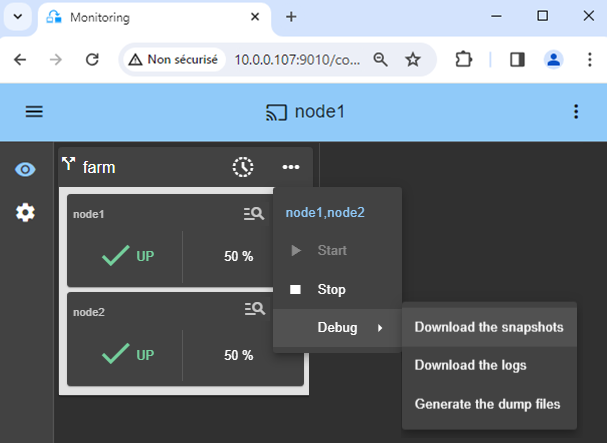
10. Wait for the transition to UP (green) / UP (green)
Node 1 and node 2 should reach the UP (green) state, which means that the start_both
script has been executed on node 1 and node 2.
If UP (green) is not reached or if the application is not started, analyze why with the module log of node 1 or node 2.
- click the "log" icon of
node1
ornode2
to open the module log and look for error messages such as a checker detecting an error and stopping the module. - click on
start_both
in the log: output messages of the script are displayed on the right and errors can be detected such as a service incorrectly started.
11. Testing
SafeKit brings a built-in test in the product:
-
- Configure a rule for TCP port 9010 with a load balancing on source TCP port.
- Connect an external workstation outside the farm nodes.
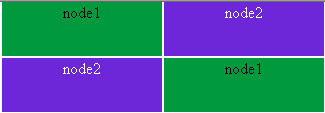
- Start a browser on http://virtual-ip:9010/safekit/mosaic.html.
You should see a mosaic of colors depending on nodes answering to HTTP requests.
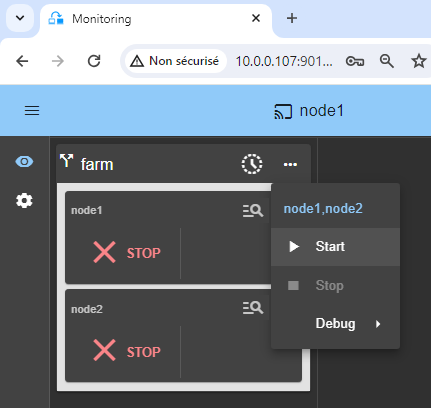
- Stop one UP (green) node by scrolling down its contextual menu and clicking Stop.
- Check that there is no more TCP connections on the stopped node and on the virtual IP address.
Find more details, along with videos, in the SafeKit Online Training.
12. Support
- For getting support, take 2 SafeKit
Snapshots
(2 .zip files), one for each node. - If you have an account on https://support.evidian.com, upload them in the call desk tool.